Welcome! This quickstart guide will get you up and running with Granola in minutes. If you’re looking for more detail, check out the other docs in Getting Started.
Platform availability
Granola currently runs on iPhone, macOS and Windows, linked to a Google account. (Feel free to join the Outlook waitlist!)Step 1: Download and install
- Go to the Granola website
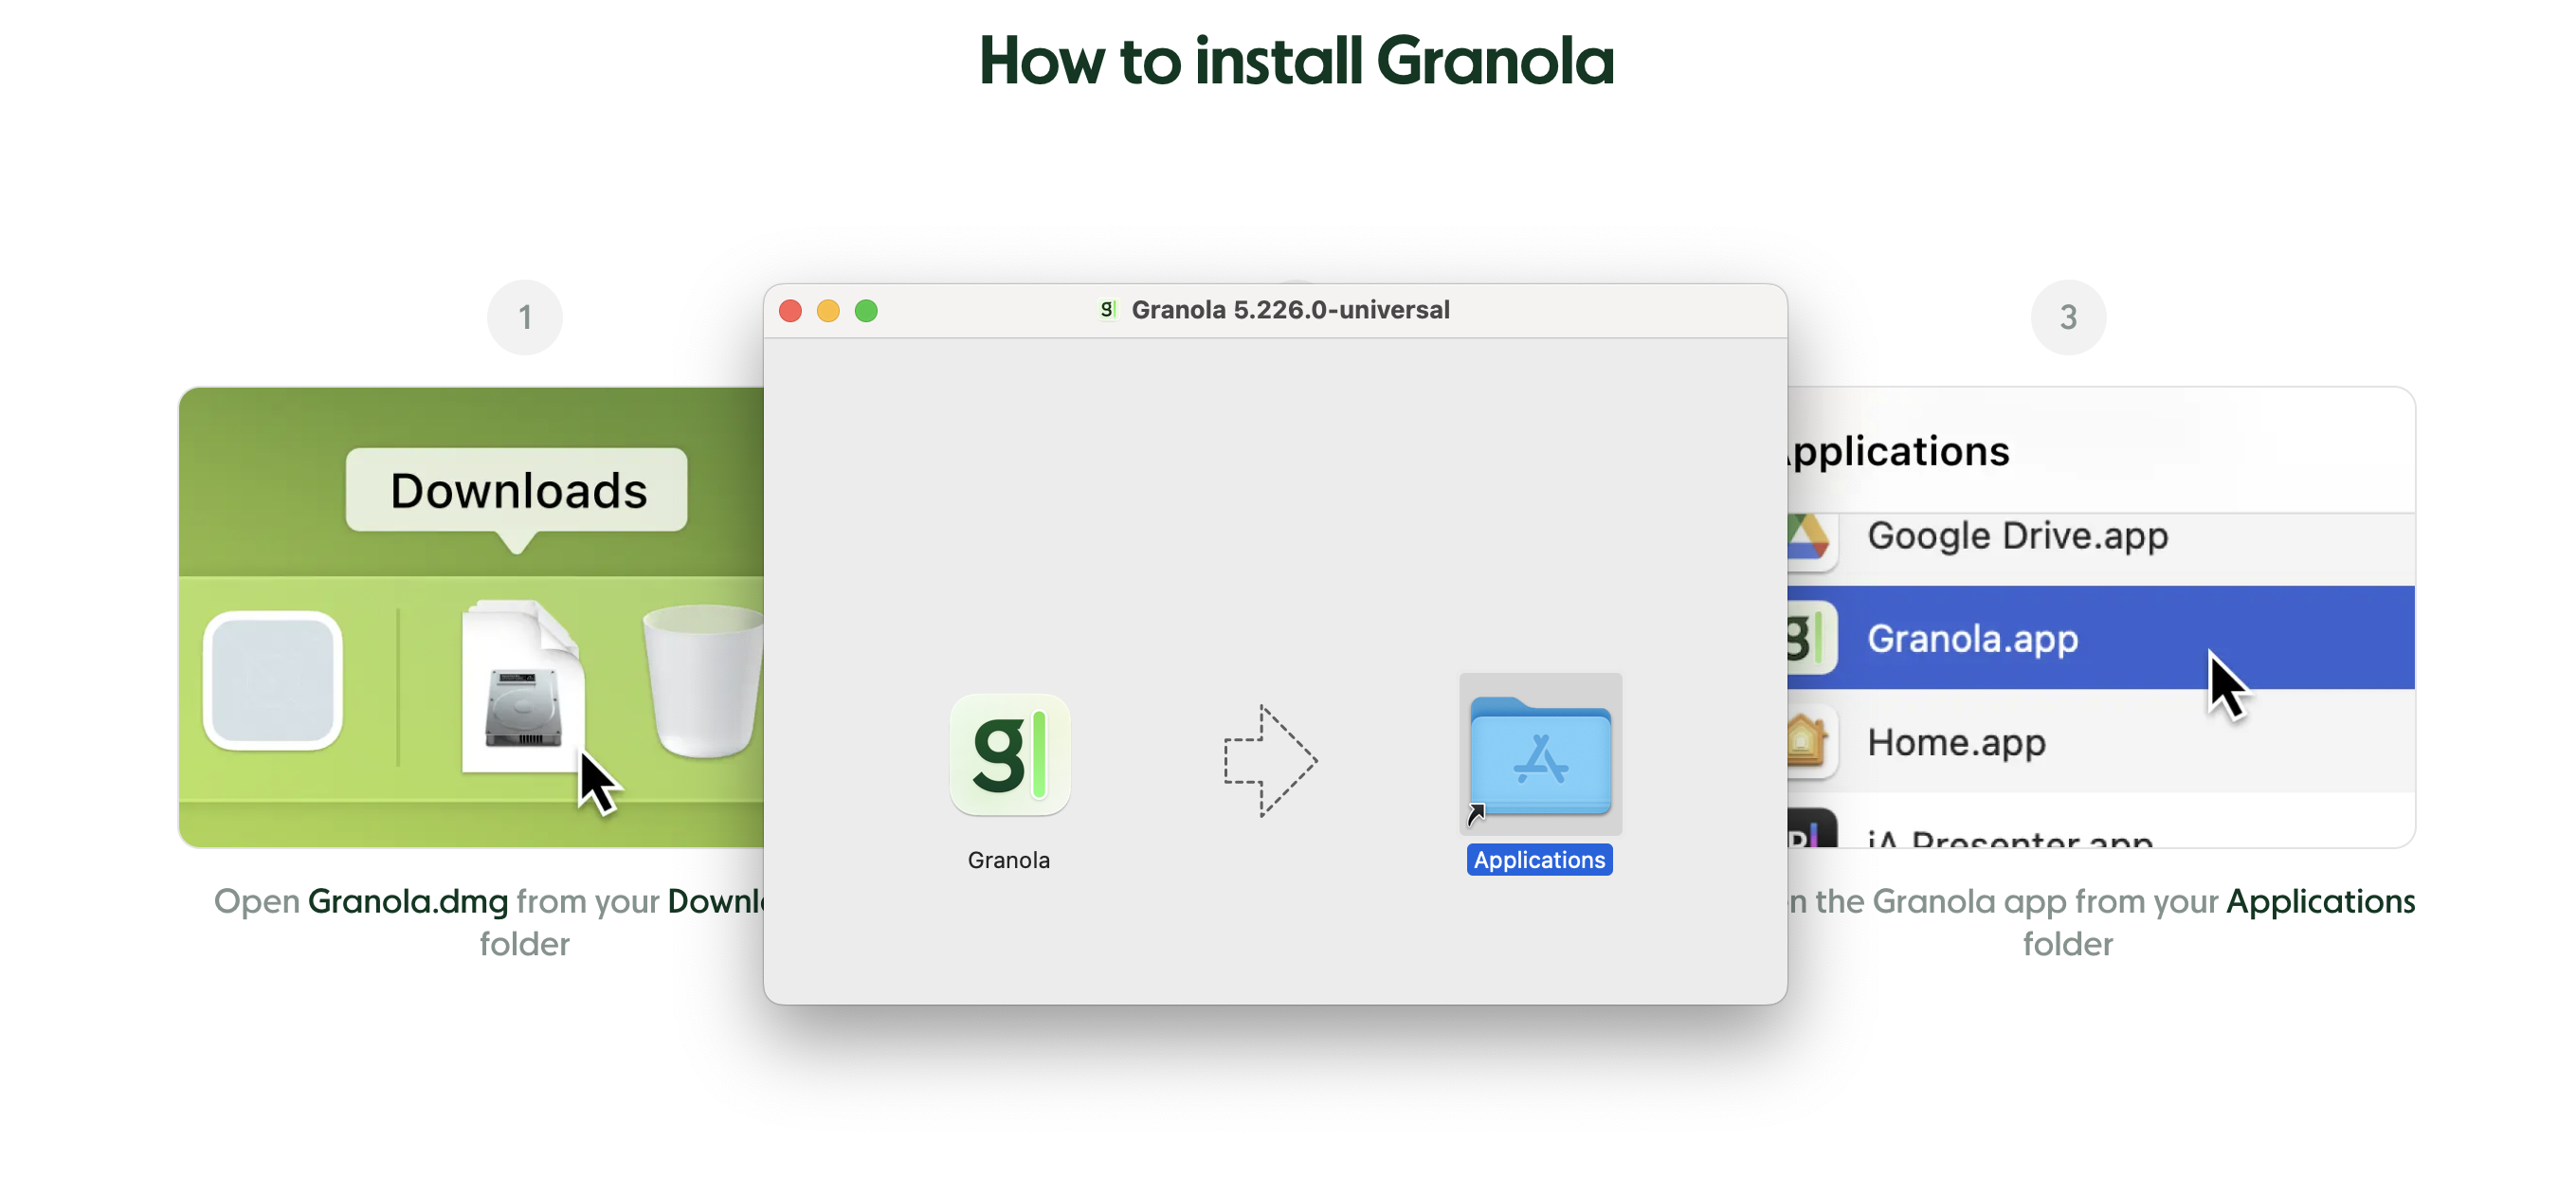
Click Download Granola for Mac. - Open the Granola.dmg
In your Downloads folder, double-clickGranola.dmg. You’ll see a new window with the Granola icon and the Applications folder. - Drag to Applications
Drag the Granola icon into your Applications folder.
Step 2: Launch Granola
Open Granola from Applications. You may see a warning:“Granola is from the internet. Are you sure you want to open it?”Click Open. Then follow any prompts to grant microphone or screen permissions if requested.
Step 3: Sign in & connect calendar
Granola will prompt you to Sign in with Google.- Accept terms & privacy policy.
- Choose the Google account you’ll use for your meeting notes.
- Grant Granola the requested permissions so it can read your calendar and prep your notes.
Step 4: Test it out
Pro Tip: Schedule a low-stakes meeting on your calendar or start an impromptu Slack/Zoom call to see how Granola captures notes in real-time.
- Check your system audio settings to make sure your default microphone/speakers match the call software that you’re using, and that mic input is set to max volume.
- Open Granola and choose the meeting (or click on the notification that pops up before it starts)
- Wait for Granola’s live transcript to appear (you might get a pop-up asking for microphone permissions).
- See your transcript appear line by line in Granola’s interface or note editor.
Step 5: Explore the key features
- Taking Notes: You can type notes in the editor while the transcript runs.
- Enhance: When the meeting ends, Granola automatically generates a polished set of notes.
- Share: Generate a shareable link or copy to Slack/Email.
- Ask Granola: Catch up on what you’ve missed during live meetings, or generate summaries, action items, or follow-up emails from your transcript once the meeting is over..